Credential Management
Create and Register Credentials
To register credentials in CS Checker, you must first create credentials on each CSP's page.
Credential registration can be done via Settings-Credential Management.
What is a Credential?
Credentials are encrypted information such as user login details and personal information.
Registering Azure Credentials
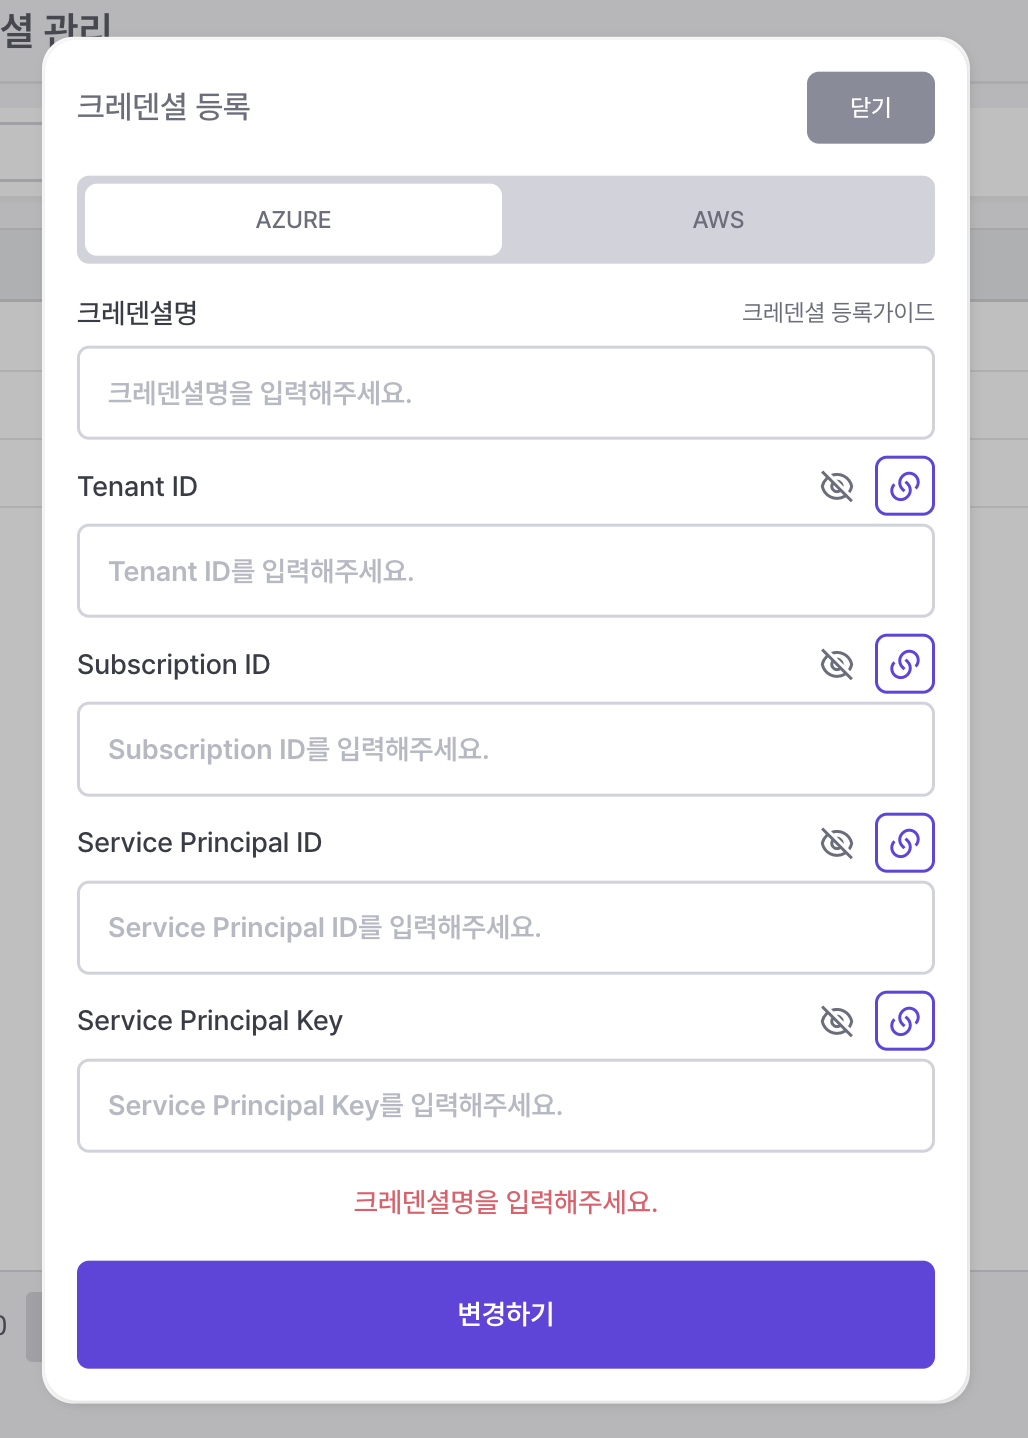
Click the Register Button.

Click the 🔗 link icon next to each field to access azure docs. Refer to the documentation to fill in the fields.
- Go to
Settings-Credential Managementand click theRegister Button. - Select Azure.
- Enter the credential name.
- Must start with an English letter.
- Special characters other than numbers, underscores, and hyphens are not allowed.
- Must be 4 to 20 characters long.
Log in to the Azure Potal.
Click on
Azuer Active Directory.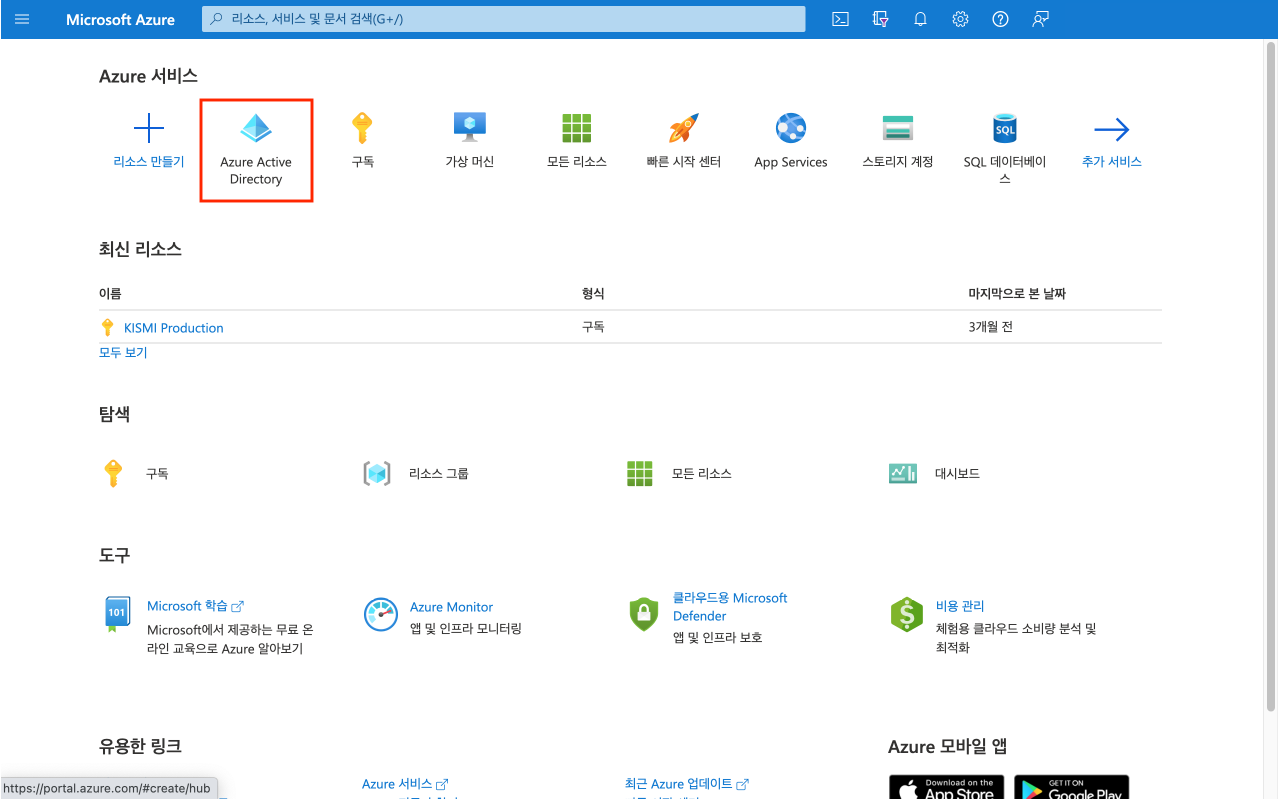
- Click
App Registrations>New Registration. - n's
registration details.
- Enter a name for the application(e.g., AspNetCore-WebApp). This name may be visible to app users and can be changed later.
- Select the account types supported by the application.
- For the Redirect URI, add the type and destination URI where the application will receive the token response after successful authentication. For example: https://localhost:44321
- Select Register.
- Under Manage, select
Authenticationand add the following information:
- In the Web section, add https://localhost:44321/signin-oidc as the Redirect URI.
- Enter https://localhost:44321/signout-oidc in the Front-channel logout URL.
- In the Implicit grant and hybrid flows section, select ID tokens.
- Click Save.
- The owner of the registered app must assign access permissions to allow other users to access the registered app. To assign roles, click on the app you just created.
- 9-1. Click Access Control (IAM). The following example shows the Access Control (IAM) page for a resource group.
- 9-2. Click the Role Assignments tab to view role assignments for the relevant scope.
- 9-3. Click Add>Add Role Assignment.
- 9-4. In the Role tab, select the role you want to assign.
- 9-5. In the Details columns, click View to check detailed information about the role.
- 9-6. Click Next.
- 9-7. In the Members tab, select users, groups, or service principals to assign the selected role to one or more Azure AD users, groups, or service principals (applications).
- 9-8. Click Select Members.
- 9-9. Search for and select the user, group, or service principal.
- 9-10. To assign the selected role to one or more Managerd Identities, select Managed Identities.
- 9-11. To assign the selected role to one or more Managerd Identities, select Managed Identities.
- 9-12. Click Select Members.
- 9-13. In the Managed Identity selection window, choose whether the type is User-Assigned Managed Identity or Managed Identity.
- 9-14. Search for and select the Managed Identity.
- 9-15. Click Select to add the Managed Identity to the members list, and then Click Next.
- 9-16. Click Review + Assign to assign the role. After a few minutes, the role will be assigned to the security principal in the selected scope.
- 9-17. If a description for the role assignment does not appear, click Edit Columns to add the Description column.
For detailed instructions on assigning Azure roles using the Azure Portal, refer to the link below: https://learn.microsoft.com/ko-kr/azure/role-based-access-control/role-assignments-portal
Enter the
Directory (Tenant) IDinto theTenant IDfield in CS Checker. Enter theApplication (Client) IDinto theService Principal IDfield in CS Checker.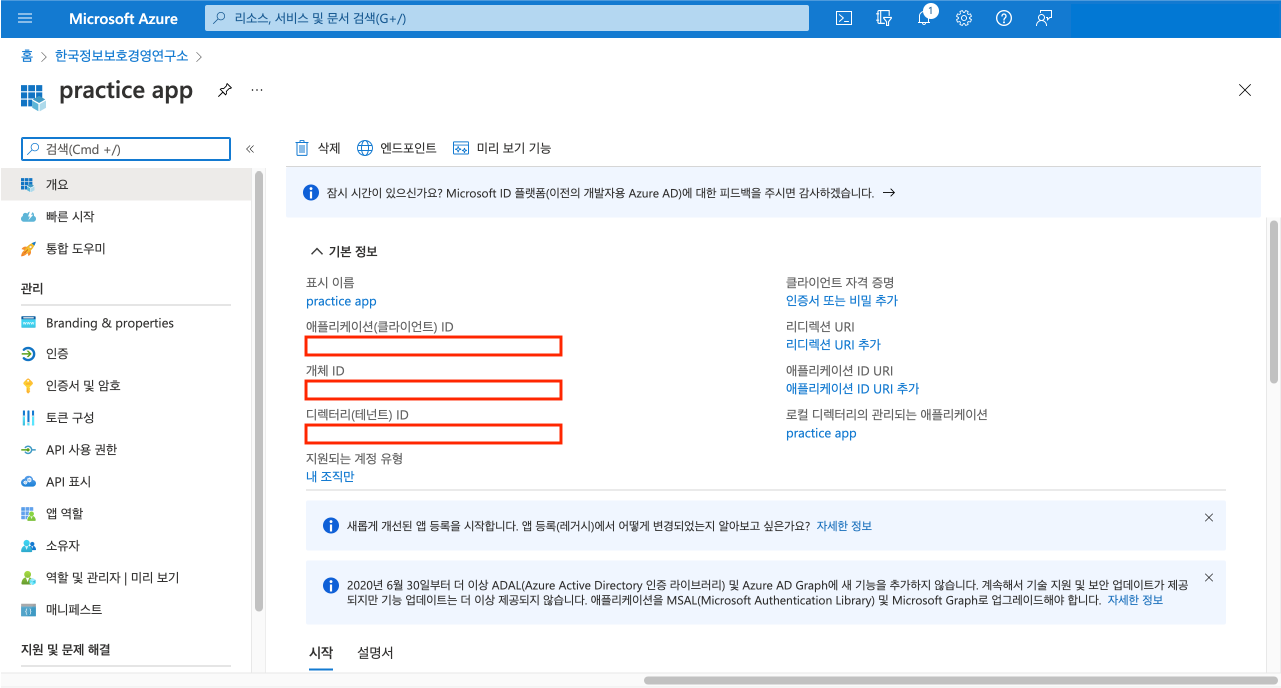
Click
Certificates & Secretsin the left sidebar.Click
New Client Secret.Enter a brief description for the key and select the expiration time. Once completed, click
Add.Copy the generated value and paste it into the
Service Principalfield in CS Checker.
Created Service Principal Key cannot be viewed again if you refresh the page. It is recommended to write it down immediately. If you forget the key value, you can generate a new one, but this is not recommended.
Return to the
Homepage on the Azure Portal and click onSubscriptions.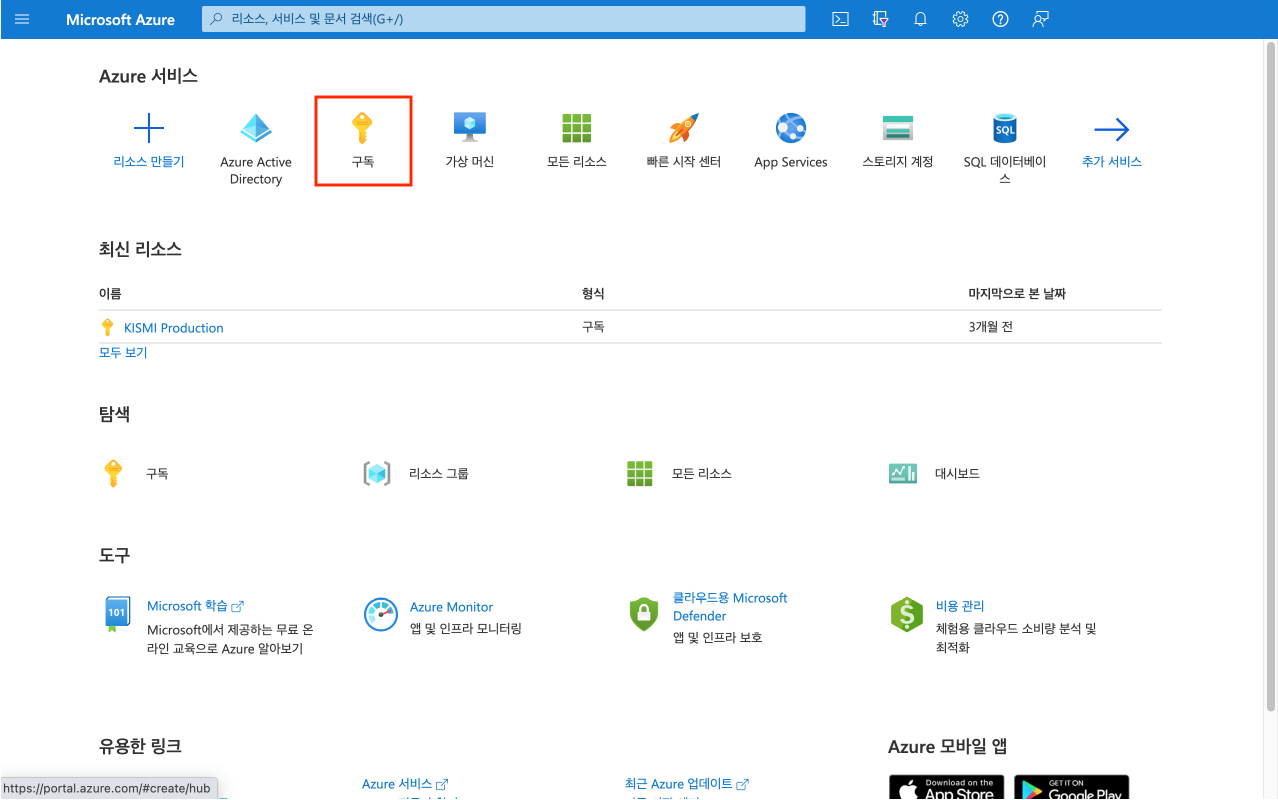
Enter the
Description IDinto theSubscription IDfield in CS Checker.
- Click the
Register.
To register credentials with Azure CLI, please refer to the link below.
https://docs.microsoft.com/ko-kr/cli/azure/what-is-azure-cli
Registering AWS credentials
- Log in to
IAMat https://console.aws.amazon.com/iam/ to open the console.
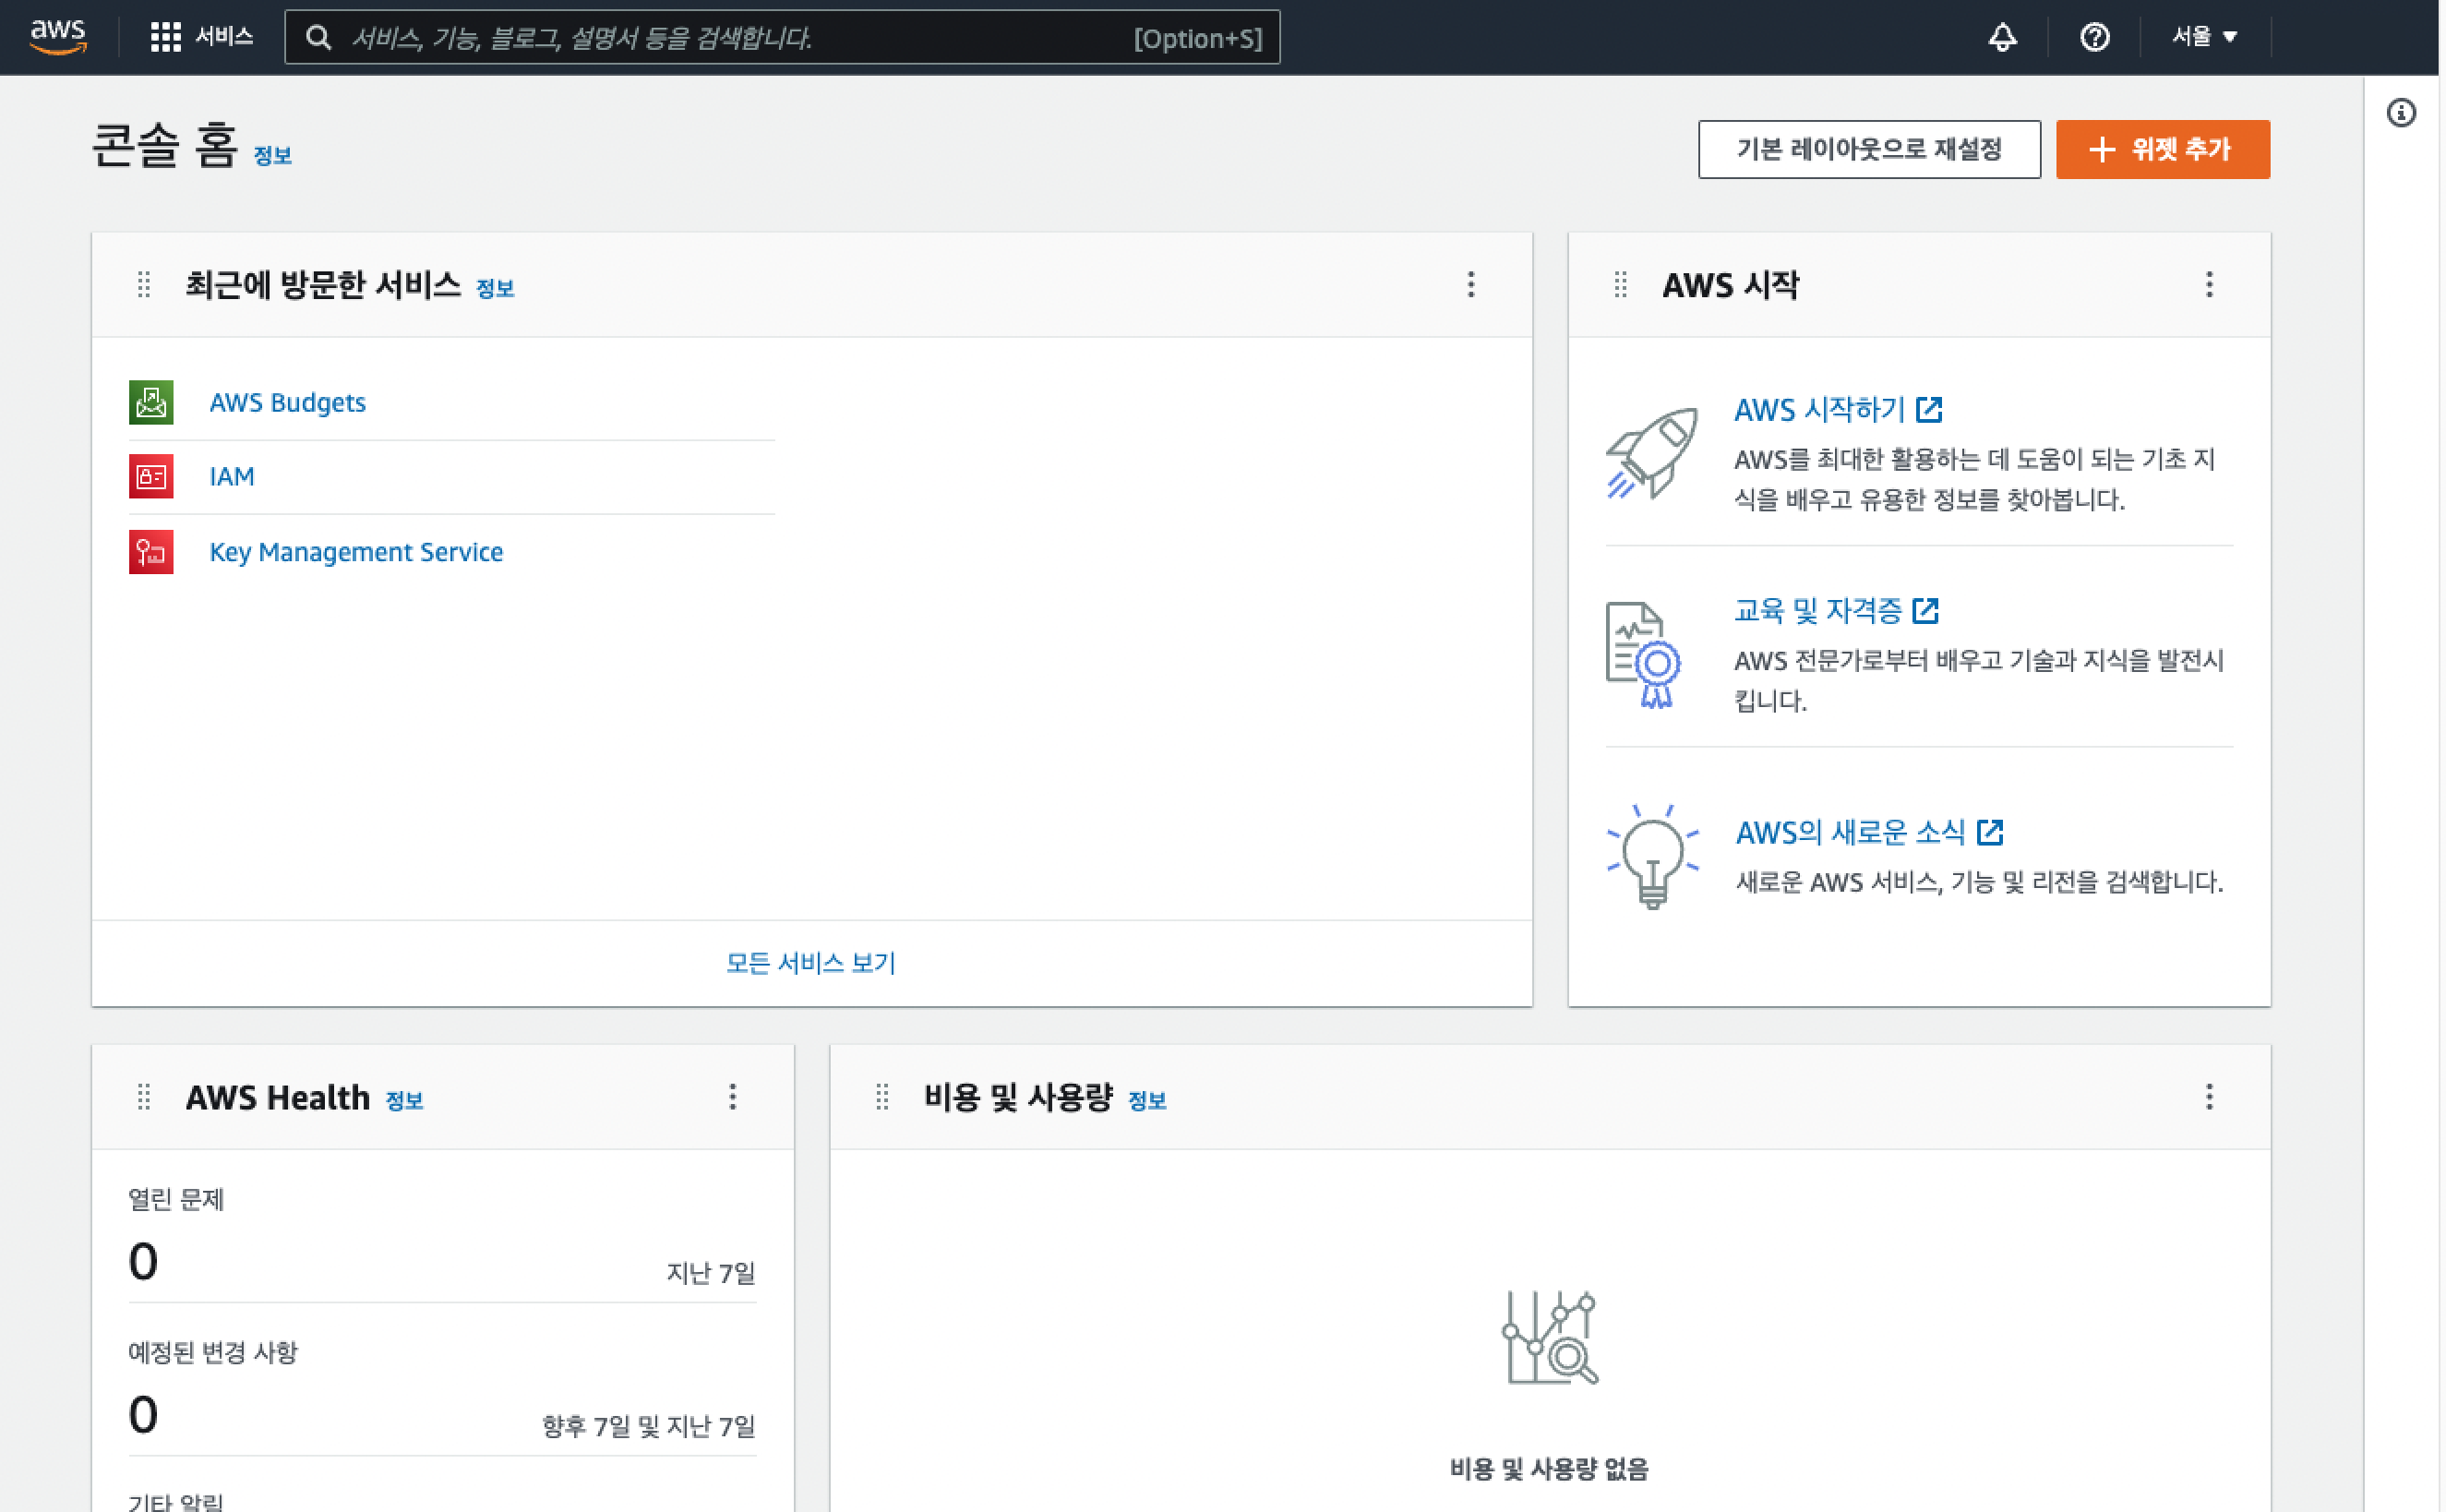
On the console home, click
My Accountin the upper right corner, then selectSecurity Credentials.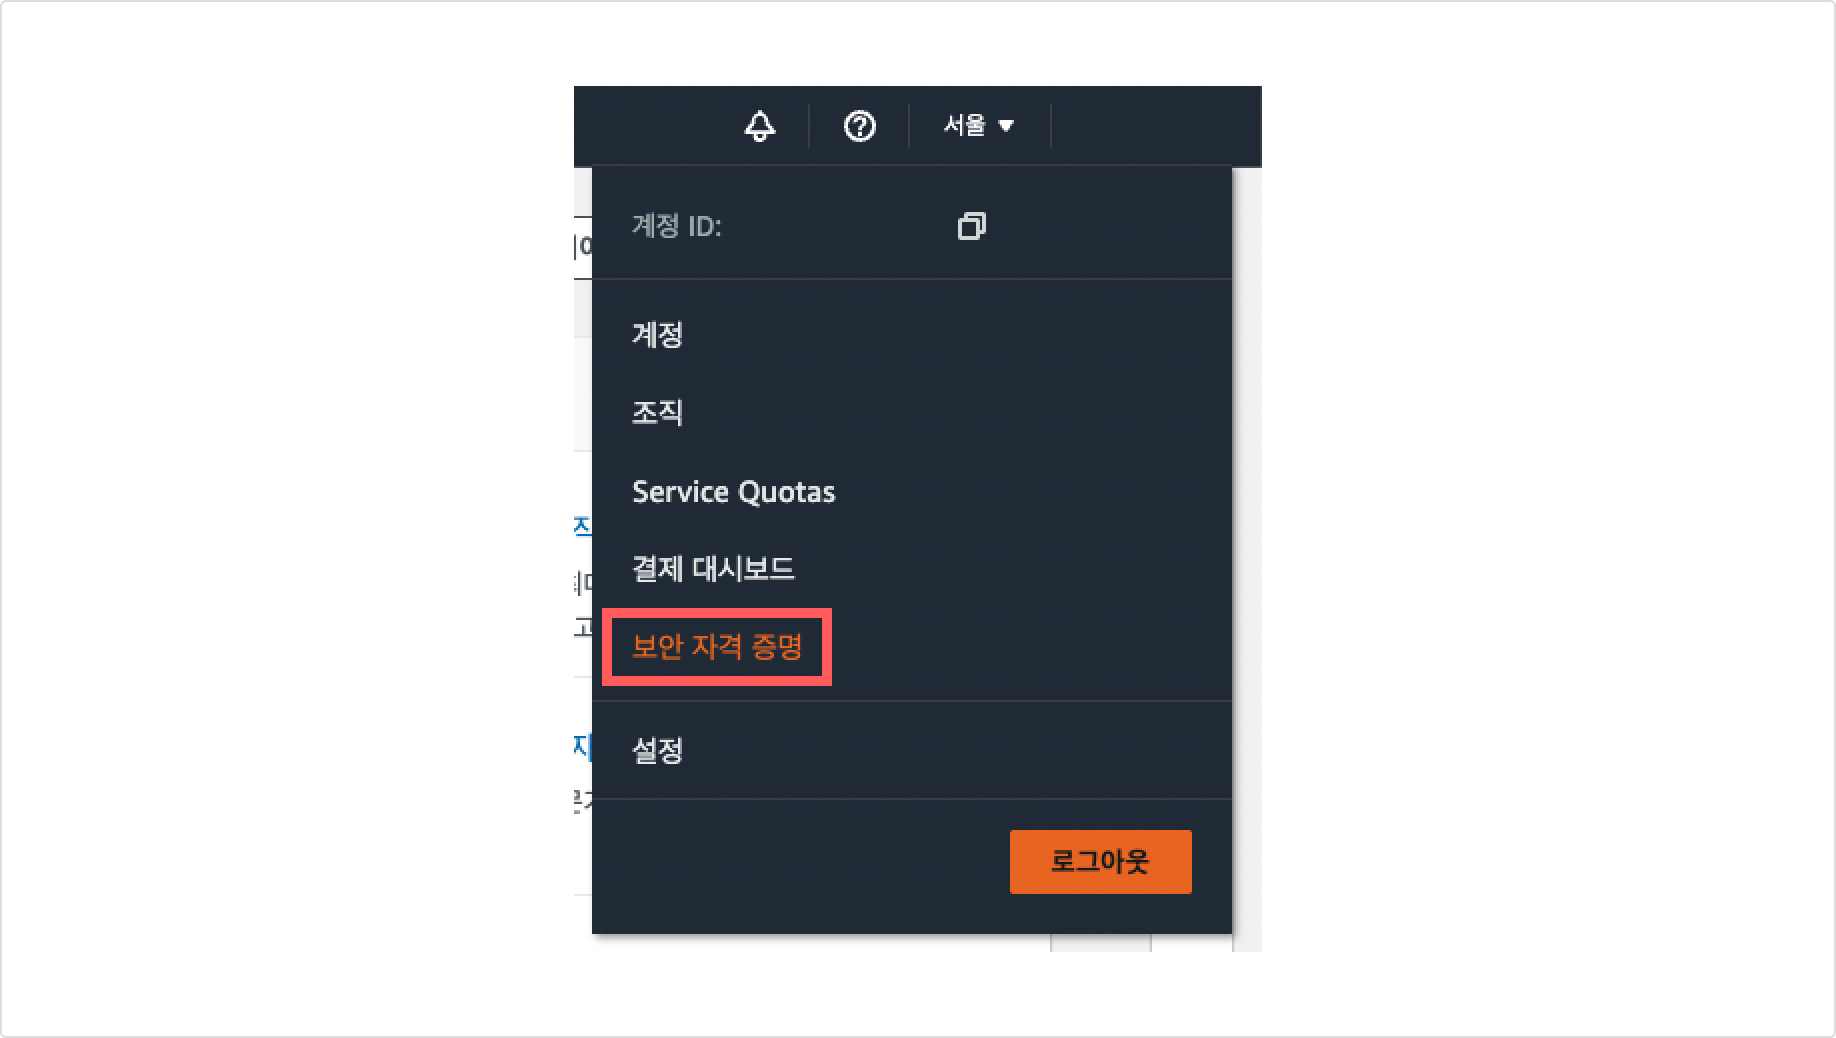
Click
Access Keys.Click
Create New Access Key.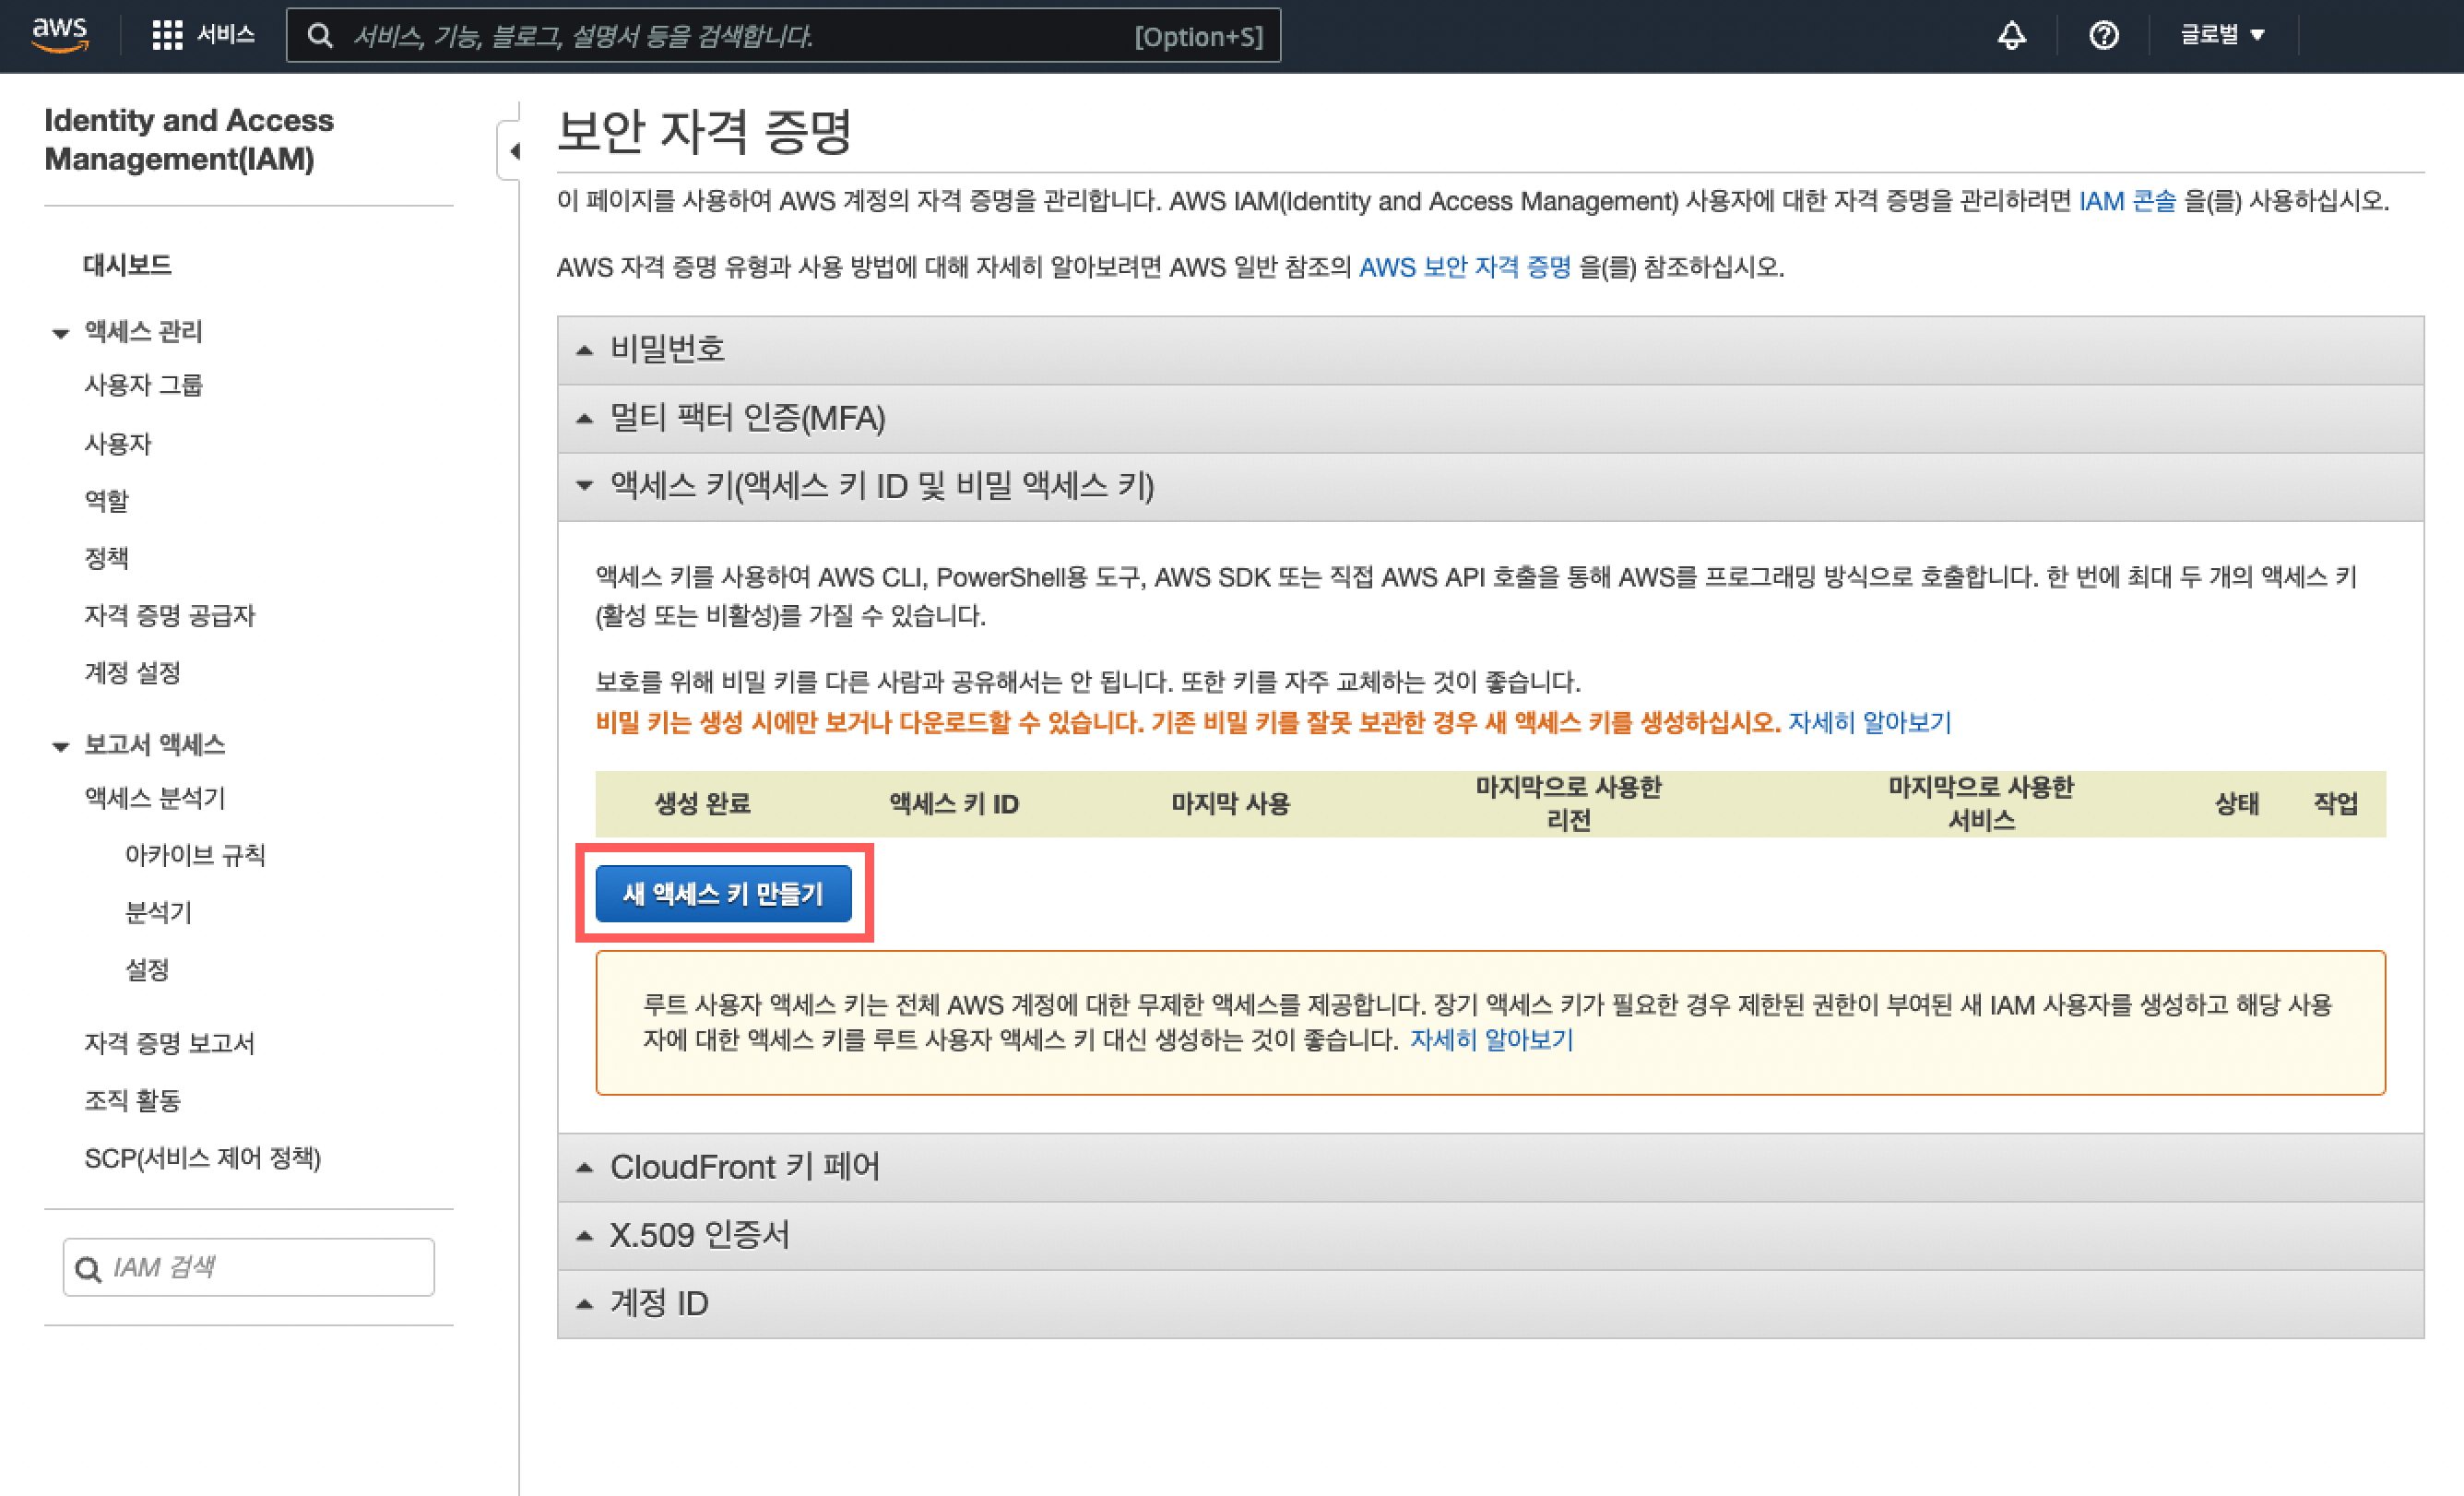
Click
Show Access Keyor download the Excel file to check the key.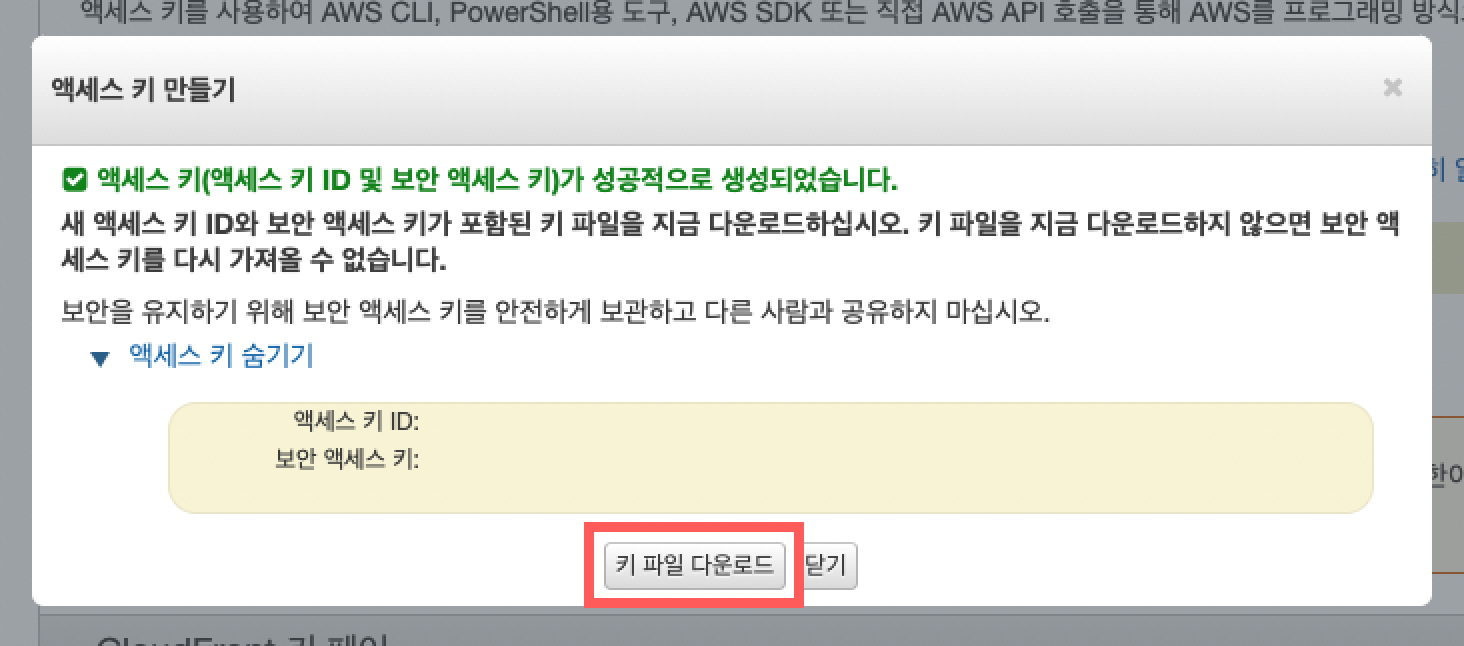
If you do not dwonload the key file containing the new Access Key ID and Secret Access Key at the time of initial key creation, you will not be able to retrieve the Secret Access Key again.
References
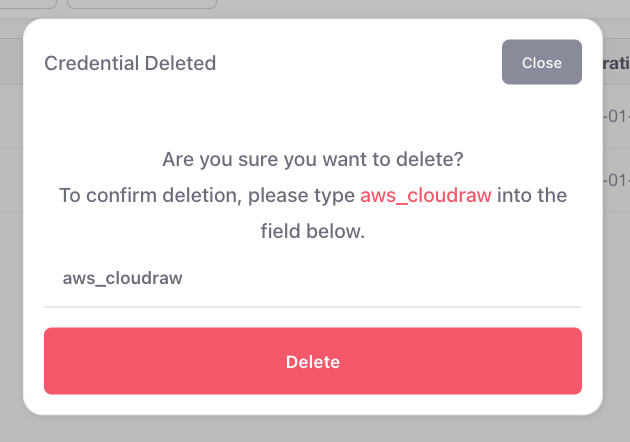
Deleting Credentials
On the credentials management page, you can view and delete credential information. To delete registered crednetials, please follow the steps below.
Click
Setting > Credentials Management.
Check the credential information to delete and click
Delete Button.
Enter the
Credential Nameyou registered, then click theDelete Buttonto complete the deletion.